
People
Members & Invitations
Your member directory. The Members page has four tabs — Active, Invited, Requests and Rejected — each with a count, so you can see who’s in, who’s been invited, who’s waiting on approval and who you turned away (a Suspended tab appears if anyone is suspended). Invite people to sign up, or — as an Admin — put someone on the list straight away, so their plan, belt and door check-ins work before they’ve ever logged in. Open any member for their details, belt progress, door PIN, attendance history and plans. Admins can change a member’s role (Member, Instructor, Admin) directly in the table.
Step-by-Step Guide
- 1Navigate to Dashboard → People → Members.
- 2Click “Invite Member”, enter their name and email address, and send — they receive a branded signup link for your gym. New people join as Members; promote staff once they’re in.
- 3Admins also see “Add to the member list now”. Tick it and the person goes straight onto the Active tab: you can put them on a plan, award their belt and give them a door PIN before they sign in. Untick “Email the invitation now” if you want to hold the email until later.
- 4The Sign-in column shows anyone who can’t sign in yet, with a button to send or resend their invitation. When they accept, everything recorded so far — belts, check-ins, bookings and plans — moves onto their own login.
- 5Track invitations on the “Invited” tab. An Admin can also add an invitee to the member list from there before they accept.
- 6When someone asks to join through your website, their request lands on the “Requests” tab and every active Admin is emailed a link to it. Approve or reject it there; rejected requests stay on the “Rejected” tab.
- 7Use the search box to find members by name or email, and click any column heading to sort.
- 8To make someone an Instructor or Admin, change the Role dropdown on their row and confirm. Only Admins can change roles, and you can’t change your own.
- 9Click a member’s name to open their profile: contact details, grading progress, door PIN, full attendance history, and the plans and class passes they’re on.
FitForge CrossFit — Managing 200+ Members
FitForge CrossFit in Melbourne grew from 40 to 200 members in 18 months. Before WeeksPro, they tracked members in a Google Sheet that constantly had merge conflicts between three coaches. After switching, each coach sees the same live directory, join requests are approved in one place instead of over text message, and new members get a branded invitation link rather than a screenshot of the signup page. Walk-ins who join on the spot go on the list there and then, and can check in the same night.
Illustrative example — names and figures are representative of typical studios, not a customer endorsement.
Pro Tips
- Invite rather than asking people to find your site and register — the invitation email carries your branding and drops them straight into signup.
- Use “Add to the member list now” when someone starts training before they’ve set up a login — a trial week, or a family that signs up at the desk. Their history follows them when they accept.
- Every member account needs its own email address, so two siblings can’t share one parent’s address.
- The Instructor role can see members, rosters and attendance but not Finance, Payroll or Billing — use it for your coaching staff.
- Check the Requests tab regularly. A join request sitting unapproved is a member who can’t book anything.
Self Check-in Kiosk
Turn any tablet with a web browser into a check-in station by the door. Members check themselves in with a PIN, the QR code in their portal, or by tapping their name, and the screen confirms the class along with their progress toward the next belt and any class pass they’re using. There’s no app to install and nothing to buy from us.
Step-by-Step Guide
- 1Navigate to Dashboard → People → Attendance and find the “Self check-in kiosk” card (Admins).
- 2Type a tablet name — e.g. “Front desk” — and click “Add a tablet”. Its row shows the tablet’s link and its PIN; open “Link & code” to see both again.
- 3On the tablet, open the link (yourgym.weekspro.com/kiosk?code=…) and enter the tablet’s PIN. The PIN is never part of the link, so a link on its own can’t connect a tablet. One tablet can hold a link for each location — bookmark each one.
- 4Back in the dashboard, set the tablet’s venue so it only lists that venue’s classes, and switch PIN, QR and “Tap name” on or off for it.
- 5Click “Create codes for everyone” so every member has a PIN and a QR code. Members see both on their profile and can choose their own PIN; staff can view or reset a member’s PIN from their member page.
- 6The kiosk lists today’s sessions ticked “This is a class / session”, opening check-in 45 minutes before each one starts and closing it 30 minutes after it ends. Members can also choose “Just training — no class”.
- 7After checking in, members see how close they are to their next belt — “18 of 30 toward Green” — and, on a class pass, how many classes they’ve used. A used-up pass asks them to see the desk but never blocks the check-in.
- 8If grading invitations are switched on, the check-in that makes a student eligible sends their invitation straight away.
Two Dojos, One Roll — Kiosk Check-in
A karate school teaching at two locations put a tablet at each door, each set to its own venue so students only see that dojo’s classes. Adults type a PIN; the juniors mostly tap their name. Instructors still run roll call for the park session in summer, and because every check-in lands in the same record, the grading list on the Ranks page stays right without anyone counting ticks.
Illustrative example — names and figures are representative of typical studios, not a customer endorsement.
Pro Tips
- On the tablet, tap “Full screen” to hide the address bar (tap it again after a reload); the kiosk keeps the screen on while it’s open. For a tablet that lives at the door, lock it to the kiosk with Guided Access (iPad) or screen pinning (Android) and set the screen to never sleep.
- Link tablets while you’re standing next to them: you need the tablet’s PIN, shown on its row. If a link gets out, open “Link & code” and regenerate the code — the old link stops working. After 10 wrong PINs a tablet locks PIN entry for 15 minutes.
- Keep “Tap name” on for a kids’ room and turn it off at an adults’ door that should insist on a PIN — each tablet has its own settings.
- The kiosk shows names and progress only — no contact details, payments or notes.
Attendance & Check-ins
Every check-in in one log. Members check in at the kiosk, coaches take roll call for a whole class, and staff can check anyone in by hand — every method writes the same record, the one that bookings, class passes and grading eligibility all read. When something’s wrong, move it to the right session or add the one that was missed: WeeksPro keeps a note of every correction.
Step-by-Step Guide
- 1Navigate to Dashboard → People → Attendance.
- 2Roll call: click “Roll call”, pick today’s class and tap names to tick them present — tap again to undo. Kiosk check-ins already show as ticked.
- 3One member: click “Check in one”, pick the session (or skip for a general check-in), then click the member’s name.
- 4The cards at the top show Today, Last 7 days and the total for the dates you’ve picked. Filter the log by date range, venue, session or member name, and click CSV to export everything that matches.
- 5The Via column shows how each check-in was made — Kiosk · PIN, Kiosk · QR, Kiosk · name, Roll call, Roster or Staff.
- 6Checked into the wrong class? Click the pencil (Change session) on the row and pick the right session — or none, for a general check-in. Bookings follow the move, and the row is marked “Corrected” with a note of what changed, when, and who changed it. The CSV includes a Corrections column.
- 7Use the bin icon only for a check-in that shouldn’t exist at all. A deleted check-in stops counting toward grading and class passes.
- 8For one person’s full record, open their member page. The Attendance history card lists every check-in at your gym, filters by date, venue and session, and exports to CSV — with the same Change session and delete buttons.
- 9Someone trained but forgot to check in? On their member page click “Add missed check-in”, pick the session (or a time, for a general check-in) and save. It’s noted as added by you, and counts like any other check-in.
The Two Missing Classes
A parent asked why their son was still two classes short of grading when he’d “been every week”. The instructor opened his attendance history on his member page and found the answer in a minute: twice he’d tapped the adults’ class on the tablet instead of the juniors’, and one Tuesday he hadn’t checked in at all. She moved the two check-ins to the right class and added the missed Tuesday. The grading count updated on the spot, and each row now says who corrected it and when — so the conversation at the door ended with a plan rather than an argument.
Illustrative example — names and figures are representative of typical studios, not a customer endorsement.
Pro Tips
- Tick “This is a class / session” on every timetable session — the kiosk and roll call list only those. One-off events use ticket scanning instead.
- Prefer Change session to delete-and-redo: it keeps the original check-in time and leaves a note of the correction.
- Check members into the actual class rather than using general check-in — it’s the difference between “someone came in” and “the 6am class is full every Tuesday”.
- Scan the log weekly for members who’ve gone quiet. There’s no automatic at-risk alert, so this is a habit worth building.
Waivers & Terms
Write your liability waiver or terms once, then attach it wherever members need to accept it: when they sign up, when they join a program, or when they book a class or event. Members see the full text and can’t proceed until they tick to accept — and every acceptance is recorded with who agreed, when, and which version they saw.
Step-by-Step Guide
- 1Navigate to Dashboard → People → Waivers.
- 2Click “New Template”, give it a title (e.g. “General Liability Waiver”) and paste your waiver text — usually the version your lawyer wrote.
- 3Save. Templates can be edited or deleted later, and each shows as Active with its version number on the Templates tab.
- 4To make a waiver part of signing up, go to Settings → Business and select it under the signup waivers. New members must accept it when they request access.
- 5To attach a waiver to a paid offering, edit the program (Content → Programs) and choose the template under “Program Waiver / Terms & Conditions”.
- 6To attach one to a single class or event, choose the template in the event form’s “Waiver / Terms & Conditions” field.
- 7The member sees the full waiver text at that moment and must tick to accept before they can continue.
- 8Every acceptance appears on the Signatures tab: the member, the waiver and version, when they accepted, and whether it happened at signup, joining a program or booking an event. Search by member name or email to find one, and click “View” to open the full wording alongside the timestamp.
- 9If you later change the wording, the template moves to a new version. Members who accepted the old text keep their record against the version they actually saw, and are asked to accept again the next time they join or book.
Dragon Gate Dojo — No More Chasing Paperwork
Dragon Gate Dojo used to hand new students a clipboard on their first night, which meant the ones who arrived late trained before they’d signed anything. They moved the waiver into signup and attached a second, stricter one to their sparring program. Nobody now reaches the mat without having read and accepted the right document, and when a parent later queried whether they’d ever agreed to the sparring terms, the answer took one search rather than an afternoon in the filing cabinet.
Illustrative example — names and figures are representative of typical studios, not a customer endorsement.
Pro Tips
- Have your lawyer write the wording. WeeksPro presents the document and records that it was accepted — what it says is a legal question, not a software one.
- Keep it readable. Long walls of legal text get skimmed, and completion drops.
- Use separate templates for different risk levels — general membership vs. sparring, kids’ classes vs. adults — and attach the right one to each program.
- Edit the wording only when you mean to. A content change starts a new version and everyone will be asked to accept again; fixing a typo in the title doesn’t.
What Your Members See
Every member gets their own logged-in area, built from the same data you manage. They book classes, join and pay for programs, book personal training, see their belt progress and class-pass count, work through course lessons, log workouts and check their own payments — without emailing you. It runs in any phone or desktop browser.
Step-by-Step Guide
- 1Members sign in at your gym’s web address and land on their own home page: your live announcements at the top, then a My Membership card showing their plans — and, on a class pass, how many classes they’ve used.
- 2My Classes — they browse the classes you’ve made public, book a spot, and cancel themselves while they’re still inside the cancellation window you set on the event. A class you’ve limited to one program only shows to that program’s members.
- 3When a class is full and you’ve enabled the waitlist, they join the queue. If a confirmed spot frees up, the person at the front is promoted automatically and emailed.
- 4Programs — they can browse and join any program you’ve marked “Allow Members to Join”, and cancel it themselves if you’ve allowed self-cancel. Joining a paid program is what starts billing.
- 5Finance — their payments and invoices, when each plan next charges, and their saved payment methods: a card, or a bank account for BECS direct debit. Plans you added for them yourself show as not billed through WeeksPro.
- 6PT Sessions — they buy a package, then book an open slot in an instructor’s available hours over the next seven days, and can cancel outside the package’s cancellation window.
- 7My Ranks — their belt history and how many classes they’ve done toward the next belt.
- 8Workouts — published workouts appear here, and members log their score, time, rounds, reps, whether it was Rx’d, and notes. Their personal records are kept for them.
- 9My Progress — they record weight, body fat, waist, chest and hips over time, and set goals with a target value and date.
- 10Courses, Pro Shop, Events & Tickets, Announcements and Challenges each have their own section, and appear only if you use that module.
Core Collective — Ending the Instagram DMs
Core Collective’s owner was answering the same three questions on Instagram every evening: what time is the Tuesday class, is it full, and did my payment go through. Once members had their own portal with the timetable, live capacity and their payment history in it, those messages mostly stopped. The studio didn’t add staff — it just stopped being the only place the information lived.
Illustrative example — names and figures are representative of typical studios, not a customer endorsement.
Pro Tips
- Turn on self-join for programs you’re happy to sell without a conversation; leave it off for anything that needs an assessment first.
- Set a cancellation deadline on classes. Members see it before they book, and it’s enforced — staff can still override when it’s genuinely warranted.
- Members can only see what you’ve created. Publish workouts and announcements regularly and the portal becomes a daily habit rather than a place they visit to pay.
Schedule
Classes & Events
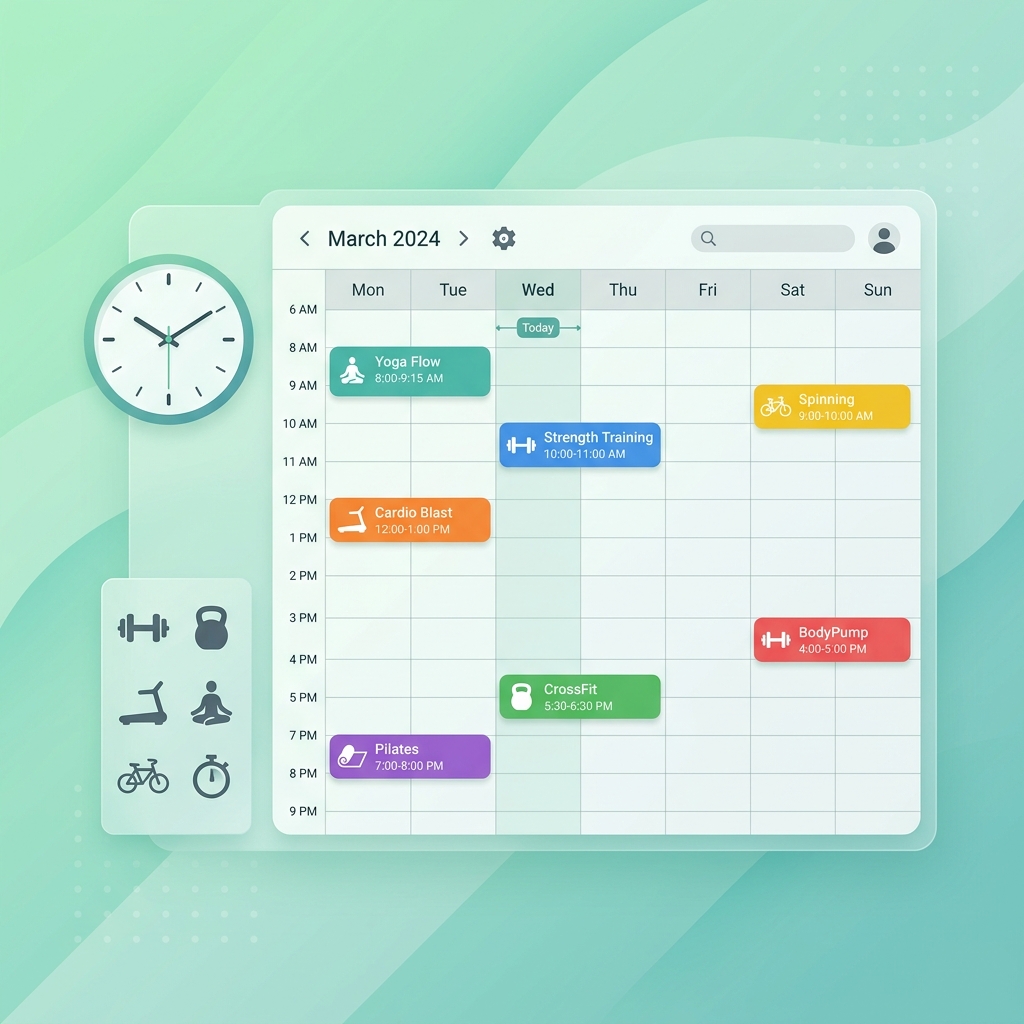
One page for everything on your timetable. Switch between a calendar and a table view, drag out a time slot to create a session, and set up recurring classes that populate themselves. Classes carry a capacity, a waitlist, a cancellation deadline, an instructor and a room.
Step-by-Step Guide
- 1Navigate to Dashboard → Schedule → Events.
- 2Use the Calendar / Table toggle. On the calendar, drag across a time range to start creating an event at that time.
- 3Fill in the title, start and end, timezone and location — or tick “Online event” and add the link.
- 4Tick “Public (visible to members and without login)” for anything members should see: it appears in their portal and on your website’s /calendar page. Leave it unticked and only staff see it — a member who has already booked still sees their own booking.
- 5With Public ticked, use “Who can see it” to limit a class to one program’s members — a juniors’ class that only juniors see in their portal. Your website calendar still lists every public class.
- 6Tick “This is a class / session” to unlock the class fields: class type, instructor name, room or studio, capacity, cancellation deadline in minutes before the start, and “Enable waitlist when class is full”. Classes are also what the check-in kiosk and roll call list.
- 7Optionally attach a workout so the WOD shows against the class, and a waiver members must accept before they can book.
- 8To repeat it, tick “Repeat”, choose the frequency and set “Repeat until” — the whole series is generated. When you edit a series later you can apply the change to every occurrence.
- 9Open any event to see who’s booked and who holds a ticket.
Rhythm & Grace Dance Academy — Term-Based Scheduling
Rhythm & Grace runs four terms a year, each with ten weekly classes. Before WeeksPro, the owner spent a weekend each term recreating the schedule in Google Calendar and emailing 150 parents. Now she sets up each recurring class once with a “repeat until” date at the end of term, then edits the handful of sessions that fall on public holidays. Parents book through the member portal.
Illustrative example — names and figures are representative of typical studios, not a customer endorsement.
Pro Tips
- Set the cancellation deadline to whatever notice you actually need. Members see it before they book, and the deadline is enforced server-side.
- Enable the waitlist on anything that fills. When someone cancels, the next person in the queue is promoted automatically and emailed.
- Build the whole term with “Repeat until”, then adjust the individual sessions that clash with holidays — far faster than creating them one by one.
Workouts & WODs
Build workouts with a format, a time cap, rounds and a movement list, then publish them so members can see them and log their results. Formats: AMRAP, For Time, EMOM, Strength, Chipper and Custom.
Step-by-Step Guide
- 1Navigate to Dashboard → Schedule → Workouts.
- 2Click “New Workout”, give it a title (e.g. “Fran”, “Morning Strength”) and choose the type.
- 3Add the description, and the time cap in minutes and number of rounds where they apply.
- 4Add your movements in the Movements section.
- 5Tick “Published” when saving, or use the Publish button on the workout card, to make it visible to members. You can hide it again at any time.
- 6Attach the workout to a class in the event form so members see it against that session.
- 7Members open Workouts in their portal, see everything you’ve published, and log their score, time, rounds, reps, whether it was Rx’d, and notes. Their personal records are tracked for them.
- 8Click “Results” on any workout to see the leaderboard: everyone who logged it, ranked. Members see the same board from their own Workouts page, with their row highlighted.
- 9Ranking follows the format — For Time and Chipper rank on the fastest time, AMRAP on the most rounds and reps. Rx’d results always rank above scaled ones, and equal results share a place.
- 10EMOM, Strength and Custom workouts show every result but aren’t ranked — there’s no score that compares fairly across members, so WeeksPro doesn’t invent one.
Iron District CrossFit — Daily WOD Programming
Iron District publishes the next day’s workout each evening and attaches it to the 5am and 6am classes. Athletes check it before they arrive and log their result afterwards, which means the coach walking the floor can see what someone did last time they hit the same movement instead of asking. The programming lives in one place rather than on a whiteboard photo in a group chat.
Illustrative example — names and figures are representative of typical studios, not a customer endorsement.
Pro Tips
- Publish the next day’s workout the night before so the early sessions can prepare.
- Attach the workout to the class it belongs to — members see it in context instead of hunting for it.
- For the board to rank people, the numeric field has to be filled in — a time in seconds for For Time and Chipper, rounds and reps for AMRAP. A freeform score still shows, but it can’t be ranked.
- Re-run a benchmark workout months later and the board shows both attempts ranked against each other — only each member’s best counts, so nobody appears twice.
Personal Training & Packages
Book one-on-one sessions and sell multi-session packages. Instructors set their available hours, members book themselves into an open slot, and each package’s credits are counted from its sessions — so the balance is always right. Sessions carry an instructor, a client, a duration, a price and a status; packages carry a session count, a price, a validity period and a cancellation window.
Step-by-Step Guide
- 1Navigate to Dashboard → Schedule → PT Sessions.
- 2On the Packages tab, create a package: title, number of sessions, price, how many days it stays valid, the default session length and the cancellation window in hours.
- 3On the Availability tab, set each instructor’s weekly hours. Members can only book inside them.
- 4Sell a package to a client. The Client Credits tab shows what’s left on every package.
- 5Book a session yourself — instructor, client, date and time, duration, and either a price or the package the credit comes from — or let members book from PT Sessions in their portal: they pick an instructor, an open slot in the next seven days and the package to use. An instructor can’t be double-booked.
- 6Every booked, completed or no-show session uses one credit; cancelling a session gives it back. A package flips to “exhausted” once the last credit is used.
- 7Members can cancel their own booking until the package’s cancellation window (24 hours if you haven’t set one). Inside it, they have to contact you — staff can still cancel.
- 8Mark each session Completed, No-show or Cancelled as it happens, and set the instructor’s PT rate in Payroll — per session, or a percentage of PT revenue — so their pay is calculated from these records.
Peak Performance PT — Scaling 1-on-1 Coaching
Peak Performance has six trainers each managing 15–20 regular clients. Scheduling used to happen over text message, which produced regular double-bookings and the occasional session nobody could remember whether the client had already paid for. Now each trainer publishes their hours, clients book the open slots themselves, and package credits count themselves down — so “how many have I got left?” has an answer both sides can see.
Illustrative example — names and figures are representative of typical studios, not a customer endorsement.
Pro Tips
- Sell packages rather than single sessions where you can — the cash arrives up front and the credit tracking is automatic.
- Set the cancellation window to your real policy. A no-show keeps its credit used; only a cancellation gives it back.
- Keep each instructor’s Availability current — it’s the only time members can book, so an out-of-date week means lost sessions.
- Marking sessions Completed matters — it’s what coach payroll is calculated from.

Revenue
Subscriptions
Programs are your plans; a subscription is one person on one program. This page is the full list of who’s on what, with Active, Paused and Cancelled counts and estimated revenue per cycle across the top. Billing starts when a member joins a paid program and pays from their own portal — by card or BECS direct debit — while plans you add yourself are records, so nobody is charged by surprise.
Step-by-Step Guide
- 1Navigate to Dashboard → Revenue → Subscriptions.
- 2Read the four cards: Active, Paused, Cancelled and Est. Revenue/Cycle.
- 3Use the status pills (All / Active / Paused / Cancelled) and the search box to narrow the list, and the column headings to sort it.
- 4For members to pay through WeeksPro, turn on “Allow Members to Join” on the program. They join from Programs in their portal and pay by card or by direct debit from their bank account; charges then run on schedule, with zero commission — only the transaction fee comes out of each payment.
- 5Someone who pays another way — cash, a voucher, an arrangement — can still be on a plan. Click “Create Subscription”, or “Add people” on the program’s page. That records the plan, so they see its classes and a class pass counts their check-ins, but nobody is charged and no billing starts.
- 6To pause or cancel a plan, change its status — from the program’s page or the member’s page, cancelling also stops any billing on it.
- 7A declined card is retried on the next billing run, and you can retry a single payment by hand from Finance. A dishonoured direct debit isn’t retried automatically: the plan is marked past due so you can follow up and retry it.
- 8If any program is a class pass, a “Class passes” tab appears here with every pass and how much of it is used. See the Class Passes guide.
Knockout Boxing Club — Off the Bank-Transfer Treadmill
Knockout Boxing collected monthly dues by bank transfer, which meant every month started with a list of people to chase and an awkward conversation or two. Moving members onto recurring direct debit took the chasing out of the owner’s hands: charges run on schedule, a dishonour shows up as past due instead of a mystery, and the paused count on this page is the first sign that someone is drifting. The three members who still pay cash are on the same plans as records, so the class lists and the numbers here stay complete.
Illustrative example — names and figures are representative of typical studios, not a customer endorsement.
Pro Tips
- Set the plan up as a Program first — that’s the thing members can see, price and join.
- Direct debit suits memberships; one-off purchases such as tickets and shop orders are card only.
- A rising Paused count is an early churn signal. Check it weekly, not monthly.
- Watch for subscriptions whose end date has passed but whose status is still Active — they’ll keep counting toward your estimated revenue.
Class Passes
Sell a fixed number of classes — a 10-class pack, a five-class trial, a term paid with a sport voucher — and let check-ins count them off. Give a program a class count and every check-in from the pass’s start date uses one. Members see “4 of 10” on the kiosk as they check in, and you see who’s close to the end before they reach it.
Step-by-Step Guide
- 1Navigate to Dashboard → Content → Programs and create or edit the program.
- 2Under “Class pass: number of classes”, enter the count — e.g. 10. Leave it empty for an ongoing plan.
- 3Open the program’s page and click “Add people”. Pick the members, set the start date (and an end date if the pass expires), and enter “Already used” for anyone who’d used some classes before you switched. Nobody is charged — it’s a record of the pass.
- 4Every check-in from the start date counts: kiosk, roll call or staff, and two in one day count as two. If someone holds two passes, each check-in goes to the earliest pass with classes left.
- 5At the kiosk, members see how many classes they’ve used. When a pass runs out the tablet asks them to see the desk, but it never blocks the check-in — anything over the limit shows as over.
- 6Review every pass in the program page’s “Class pass” card or the “Class passes” tab under Revenue → Subscriptions: classes used and left, and whether the pass is active, used up, expired, not started yet or cancelled.
- 7To fix a pass, edit it from the list or the member’s page — dates, class count, classes already used, or cancel it. Correcting a check-in in Attendance recounts the pass automatically.
- 8Members see their own count on the My Membership card on their home page.
A 10-Class Junior Pack That Counts Itself
A karate school sells a 10-class junior pack that many families pay for with a sport voucher. The instructor used to keep a tally sheet in a folder by the door and reconcile it at the end of each term. Now the pack is a program with a class count of 10. The juniors on it were added from the program’s page with the classes they’d already used, each tablet check-in shows “4 of 10”, and on the tenth class the tablet asks the parent to pop over to the desk — before the eleventh, rather than at the end of term.
Illustrative example — names and figures are representative of typical studios, not a customer endorsement.
Pro Tips
- Passes count check-ins, not bookings — a booked class only uses a pass once the member is checked in.
- Changing a program’s class count doesn’t shrink passes people already hold: they keep their number, and new passes get the new one.
- Set an end date on passes that expire, so an unused pass shows as expired rather than sitting there active forever.
- Want members to pay for a pass online? Turn on “Allow Members to Join” on the program like any other plan.
Tickets & Passes
Sell tickets for events, drop-ins and passes. A template sets the price, how many exist, how many one person may buy, and when they go on sale. Money lands in your own Stripe account — tickets are paid by card, and each payment carries only the transaction fee (1.95% + 30¢ on an Australian card), with zero commission.
Step-by-Step Guide
- 1Navigate to Dashboard → Revenue → Tickets.
- 2Click “Create Template” and set the title (e.g. “General Admission”) plus an optional type label such as GA, VIP or Early Bird.
- 3Set the price — the minimum is $2.00 — and the currency.
- 4Set Total Quantity for how many exist, and Max Per User so one buyer can’t take them all.
- 5Set “Available From” and “Available To” if the ticket should only be on sale during a window.
- 6Link the template to an event so it appears on that event’s page for members to buy.
- 7Open a template at any time to see what’s sold and what’s left.
Spotlight Dance Academy — Concert Tickets In-House
Spotlight Dance sold its end-of-year concert tickets through a third-party ticketing site that took a booking fee on every seat. Running the same concert through WeeksPro, the only deduction is the transaction fee on each payment — zero commission. They also capped tickets at six per account so one family couldn’t take a whole row.
Illustrative example — names and figures are representative of typical studios, not a customer endorsement.
Pro Tips
- Create tiers as separate templates (GA, VIP, Family) and link them all to the same event.
- Max Per User is the simplest defence against one buyer taking half the room.
- Use the availability window for early-bird pricing — set the early-bird template to close on the day the standard one opens.
Pro Shop
Sell merchandise, equipment and supplements. Products carry a price, stock count, SKU, sizes, category, images and a featured flag. Orders move through a status pipeline and can carry a tracking number and private admin notes.
Step-by-Step Guide
- 1Navigate to Dashboard → Revenue → Pro Shop.
- 2Add a product: name, description, price, stock quantity, SKU, category, and sizes (comma separated) if it’s apparel.
- 3Upload your images — the first becomes the main one. Tick Featured to push it to the front of the member shop.
- 4Members browse and buy from the Shop section of their portal, and stock counts down with each purchase.
- 5Sold something at the front desk? Press Sale on the product to record it: pick the member, type a name, or leave it as a walk-in, then choose cash, card in person, bank transfer or other. Stock counts down the same way.
- 6Click a product to open its own page, with every sale of it — online and recorded at the desk — plus units sold, revenue and how it was paid.
- 7Work through the Orders tab. Statuses run pending → paid → processing → shipped → fulfilled, with cancelled and refunded available when you need them.
- 8When you ship, record the tracking number so the member can follow it.
- 9Add admin notes to an order for anything the member shouldn’t see.
Gracie Flow BJJ — Selling Gis Without the Guesswork
Gracie Flow ordered gis in bulk and sold them at the front desk from a cash tin, which made stock levels a matter of opinion. With the Pro Shop, members order and pay online and collect at the gym. Sizes are listed on the product so nobody asks whether an A2 is in, and the owner can see what’s actually left before placing the next bulk order.
Illustrative example — names and figures are representative of typical studios, not a customer endorsement.
Pro Tips
- Take proper photos. Members buy with their eyes, and a phone snap of a folded shirt on a bench sells nothing.
- Fill in the sizes field for apparel — it stops the “do you have my size?” messages before they start.
- Announce new drops through the Announcements module so the stock moves in the first week rather than the first quarter.
Finance & Payouts
Where the money is. Connect Stripe, watch your revenue trend, work through transactions, issue refunds, retry failed payments, and check what has actually landed in your bank account.
Step-by-Step Guide
- 1Navigate to Dashboard → Revenue → Finance.
- 2If you haven’t connected Stripe yet, do it here first. The account card shows whether your details are submitted and whether payouts are enabled.
- 3The summary cards show your totals, with fees shown separately — they’re deducted before payout.
- 4The Revenue (Last 7 Days) chart shows the recent trend.
- 5Payout History lists what Stripe has sent to your bank, with both the created date and the expected arrival date.
- 6In Transactions, click any payment to open it in full. From there you can refund it, or retry one that failed.
- 7Click “Export CSV” to download the transaction list for your accountant.
Core Collective Pilates — Tax Time Made Easy
Core Collective’s owner used to dread tax time — reconciling bank statements against class payments by hand took an entire weekend. Now she exports a CSV from the Finance dashboard each month and drops it in a shared folder with her accountant, who has the transaction list, the fees and the payout dates without having to ask for anything.
Illustrative example — names and figures are representative of typical studios, not a customer endorsement.
Pro Tips
- Connect Stripe before you create anything you plan to charge for — programs, tickets and shop products all depend on it.
- Issue refunds from here rather than in the Stripe dashboard, so the record in WeeksPro matches your books.
- Export monthly rather than at year end. Reconciling twelve small files beats reconciling one enormous one.
Instructor Payroll
Set each instructor’s pay rate once, choose a date range, and the calculator works out what they’re owed from the classes they taught and the PT sessions they completed. Six rate types: per class, per hour, per PT session, a percentage of PT revenue, fixed weekly, or fixed monthly — and a coach can hold more than one.
Step-by-Step Guide
- 1Navigate to Dashboard → Revenue → Payroll.
- 2On the Pay Rates tab, add a rate: pick the instructor, the rate type and the amount. Add a note if the arrangement needs explaining.
- 3Switch to the Pay Calculator tab and set the period From and To dates.
- 4Run the calculation. Each instructor shows classes taught, PT sessions completed, and earnings split into class, PT and fixed components, with gross pay.
- 5Mark an instructor as Paid once you’ve sent the money — the row is badged so nobody gets paid twice.
- 6Click “Export CSV” to hand the whole period to your bookkeeper.
UrbanFit Gym — Managing 12 Trainers
UrbanFit has twelve trainers on three different arrangements: some per class, some hourly, and two on a retainer plus commission on their PT work. The manager used to rebuild the same spreadsheet every fortnight. Now each trainer’s rates are set once — including the two who hold both a fixed monthly rate and a PT percentage — and a fortnight’s pay is a date range and a button.
Illustrative example — names and figures are representative of typical studios, not a customer endorsement.
Pro Tips
- A coach can hold more than one rate — a fixed monthly retainer plus a per-PT-session rate is a common combination.
- The calculator reads from your events and PT sessions, so keep sessions marked Completed or the numbers will run light.
- Percentage rates are calculated on PT revenue, which makes commission arrangements straightforward to explain to a coach.

Engage
Leads & Enquiries
A simple CRM for everyone who isn’t a member yet. Contact-form submissions and new sign-ups land here automatically; you add walk-ins and phone enquiries yourself. Every lead carries a status, a source, a follow-up date and a full history of what was said and when. Admin only.
Step-by-Step Guide
- 1Navigate to Dashboard → Engage → Leads.
- 2Enquiries from your website’s contact form appear on their own, deduplicated against existing leads by email and phone.
- 3Click “Add Lead” for a walk-in or phone enquiry: name, email, phone, gender, age range, suburb, source, what they’re interested in, and notes.
- 4Bulk-loading a list? Click “Download CSV template”, fill it in, then “Import CSV”. Rows are validated on exactly the same rules as the form, and you can download a per-row result including any errors.
- 5Move a lead along the pipeline: New → Contacted → Trial booked → Trialing → Won or Lost. Marking one Lost asks you why — price, location, timing, competitor, no response or other.
- 6Log what actually happened: a call, SMS, email, walk-in, tour, trial class, or a plain note. Dates can be backdated if you’re catching up at the end of the week.
- 7Set a follow-up date. Anything overdue or due today appears in the amber banner at the top of the page.
- 8Switch between List and Board views and filter by status or source. The four cards show total leads, new this month, won, and your conversion rate.
- 9When a lead joins, they’re marked Won and linked to their member record automatically. If they later cancel their subscription, they move to Former member.
Red Dragon MMA — Enquiries That Stopped Falling Through
Red Dragon was tracking enquiries in the owner’s phone notes and a whiteboard by the desk. Trials got booked and then forgotten, and nobody could say how many walk-ins turned into members. Moving to the Leads board gave every enquiry a next action and a date — and the overdue banner at the top of the page turned out to be the feature that changed behaviour, because an ignored follow-up is visible to everyone on the front desk.
Illustrative example — names and figures are representative of typical studios, not a customer endorsement.
Pro Tips
- Leads start from the day you switch this on — existing members aren’t backfilled, so don’t expect your history to appear.
- The follow-up date is the whole point. A lead with no next action is a lead you’ve already lost.
- Logging is manual: WeeksPro doesn’t send emails or texts from the Leads page, so log the call after you make it.
Contact Messages
Messages from your website’s contact form land here. Define up to 10 contact reasons, each routing to its own email address, and every reason gets its own tab so nothing disappears into one shared inbox.
Step-by-Step Guide
- 1Navigate to Dashboard → Engage → Support.
- 2The All tab lists every message, with unread ones highlighted.
- 3Click a message to read it in full with the sender’s details and timestamp — opening it marks it as read.
- 4Mark messages as read or archived as you work through them.
- 5To set up routing, open the Settings tab on this page.
- 6Add up to 10 contact reasons — for example “Billing”, “Trial class”, “Facility issue” — each with the email address it should be sent to.
- 7Save. Each reason then gets its own tab here, and appears in the dropdown on your website’s Contact Form block.
AllFit Gyms — Routing Enquiries to the Right Desk
AllFit runs three locations with different staff at each. They set up reasons like Billing, Class enquiry and Facility issue, each pointed at the address of the team that actually handles it. Instead of one person triaging everything and forwarding it on, each message arrives where it needs to be, and the tab counts make it obvious when one category is being neglected.
Illustrative example — names and figures are representative of typical studios, not a customer endorsement.
Pro Tips
- Three or four reasons is usually plenty. Offer ten and people pick the wrong one.
- Contact-form submissions also create a Lead, so a sales enquiry appears in both places — answer it here, and track the follow-up there.
- Archive rather than leaving everything read. The tab counts are only useful if they mean something.
Announcements
Broadcast to your members. Each announcement carries a type (Info, Warning, Update or Maintenance), a priority (Normal or Urgent), an optional publish and expiry time, and optional role targeting.
Step-by-Step Guide
- 1Navigate to Dashboard → Engage → Announcements.
- 2Click “New” and write the title and body.
- 3Choose the type — Info, Warning, Update or Maintenance — and the priority, Normal or Urgent.
- 4Set “Publish At” if it should go live later, and “Expires At” if it should disappear on its own once the date has passed.
- 5Under Target Audience, click the roles it’s for. Leave it empty and everyone sees it.
- 6Publish it, or leave it unpublished as a draft. The eye button on any announcement publishes or hides it later.
- 7Filter the list by All, Live, Draft, Scheduled or Expired to see where everything stands.
- 8Members see live announcements in two places: at the top of their home page when they sign in, and on the Announcements page in their portal. Nothing is emailed or pushed — use Campaigns when it needs to reach an inbox.
FitHub 24/7 — Holiday Schedule Communication
FitHub used to post holiday closures on Instagram, on their website, and in a WhatsApp group — and members still turned up to locked doors. They now post once as a Maintenance announcement at Urgent priority, with an expiry set to the day the gym reopens. It sits at the top of every member’s dashboard until it’s no longer relevant, then removes itself.
Illustrative example — names and figures are representative of typical studios, not a customer endorsement.
Pro Tips
- Set an expiry on anything time-bound. Stale notices at the top of the feed train members to ignore the feed entirely.
- Use Urgent sparingly — if everything is urgent, nothing is.
- Target Instructor only for staff notices so the member feed stays clean.
Challenges & Leaderboards
Run a competition with a metric, a date range and a leaderboard that ranks everyone by their total. Types cover fitness, nutrition, attendance, weight loss, steps and custom.
Step-by-Step Guide
- 1Navigate to Dashboard → Engage → Challenges.
- 2Click “New Challenge” and set the title, description, type and the rules.
- 3Set the metric and its unit — e.g. “burpees” / “reps”, or “distance” / “km” — so everyone logs the same thing.
- 4Set the start and end dates, and the prize if there is one.
- 5Members join and log their entries from the Challenges section of their portal.
- 6Click a challenge to open its leaderboard: participants ranked by total, with their entry count and the date they last logged.
- 7Use the eye button to hide a challenge without deleting it, and the filters to view Active, Upcoming or Ended.
Summit CrossFit — The 30-Day Burpee Challenge
Summit ran a thirty-day burpee challenge where members logged their daily count. Roughly half the gym joined, and the leaderboard did what a whiteboard tally never quite managed — people checked it, and then went and did a few more. The winner got a free month; the real return was a month of members having a reason to open the app every day.
Illustrative example — names and figures are representative of typical studios, not a customer endorsement.
Pro Tips
- Run one a month. Momentum matters more than the size of the prize.
- Write the rules field properly — it’s where you settle the arguments before they happen.
- Announce the result through the Announcements module. Public recognition is most of the reward.
Email Campaigns
Send an email to a segment of your members. Choose the audience, see exactly how many people will receive it, send yourself a test first, then send. Unsubscribed members are skipped automatically, and every email carries your business details and an unsubscribe link.
Step-by-Step Guide
- 1Navigate to Dashboard → Engage → Campaigns.
- 2Click “New Campaign”, name it, and write the subject line and body. Use {{name}} and {{email}} to personalise.
- 3Pick a type for your own filing — Manual, Welcome, Re-engagement, Birthday, Renewal Reminder, Promotion or Newsletter.
- 4Pick the audience: All Members, Active Members, Inactive Members (suspended or lapsed memberships — your win-back list), or Instructors Only. The recipient count updates as you choose, and tells you how many unsubscribed members will be skipped.
- 5Save it as a draft. Setting a “Planned send date” marks the campaign as Scheduled so you can filter for it — but nothing sends unattended. When the date comes you still open it and press Send.
- 6Open the draft, send a test to your own address, and read it on a phone before it goes anywhere near your list.
- 7Click “Send to N recipients”. Sending can’t be undone.
- 8Duplicate a campaign that worked to reuse it later.
Harmony Yoga — Re-Engaging Lapsed Members
Harmony Yoga had a group of former regulars whose memberships had lapsed months earlier. They wrote a short, personal email offering a free class that week and sent it to the Inactive Members audience — the segment that targets exactly those lapsed memberships. A meaningful number came back through the door, and the ones who didn’t at least stopped being a vague guilty thought at the end of each month.
Illustrative example — names and figures are representative of typical studios, not a customer endorsement.
Pro Tips
- Send the test to yourself every single time. The typo you find is always in the subject line.
- Segment properly — the message that wins back a lapsed member reads badly to someone who trained yesterday.
- Editing a campaign that has already sent won’t send it again. Duplicate it and send the copy.
Ranks & Belt Progression
Your belt syllabus, every grading on record, and a live list of who’s ready to grade. Give each belt a colour, an order and the number of classes it needs; WeeksPro counts every check-in since a student’s last grading and flags who’s eligible. Juniors and adults can run separate ladders, and eligible students can be emailed a grading invitation automatically.
Step-by-Step Guide
- 1Navigate to Dashboard → Engage → Ranks (called Belts with the Martial Arts setup).
- 2Click “Add Rank” and set the name (e.g. “Yellow Belt”), the colour, and the level number that fixes its place in the order. The arrows reorder belts later.
- 3Set “Classes required” — the classes a student needs since their last grading to be eligible for this belt. Leave it blank on your starting belt and on anything not earned by class count. Write the syllabus in Requirements: students can read it, but WeeksPro only counts classes, so time-in-grade rules stay with you.
- 4Running juniors and adults on different syllabi? Link each belt to its program, and each program gets its own ladder.
- 5Record a grading with “Award Rank”, or with Promote on the Eligibility tab: choose the member, the belt and the grading date (back-dating is fine) and add a note. Classes on grading day count toward the belt just earned; the count for the next one starts the following day. Moving from old records? Enter “Classes already attended since then” as an opening balance.
- 6The Eligibility tab lists every active student with their current belt, next belt, classes done and classes to go — eligible first, then closest. Filter to “Eligible only” or by ladder, and export to CSV for grading day.
- 7Optional: open the Auto-invite settings on the Eligibility tab, pick the next grading event (or describe it), add your own message and a reply-to address. Eligible students are emailed once per belt — and again when you schedule a new grading. “Send invitations” emails everyone due right now, even with auto-invite off.
- 8The Awarded tab lists every grading with the member, the belt, the date and your note. Revoking one makes the student’s previous belt current again.
- 9Students see their progress on the kiosk each time they check in and under My Ranks in their portal; staff see the same progress card on each member’s page.
Tiger Spirit Taekwondo — Digital Belt Records
Tiger Spirit tracks belt progression for 300 students across three locations, and for years it lived in a physical logbook that only existed in one of them. Every grading is now recorded with the date and a note about the grading it came from, and the week before each grading the instructors filter the Eligibility tab, export it and print the list. Students watch their own count climb on the tablet — which turned out to matter more for retention than anyone expected.
Illustrative example — names and figures are representative of typical studios, not a customer endorsement.
Pro Tips
- A student’s current belt is the one with the most recent grading date, not the highest one — take care when back-dating.
- Use the level number deliberately — it’s what orders the entire system, so leave gaps if you might add a stripe later.
- Students with no belt recorded count from the day they joined. If you run more than one ladder, award each student’s current belt so WeeksPro knows which ladder they’re on.
- Instructors can record gradings, but not their own — an Admin does that.
- Create the grading itself as an event so families can see it coming and book in — then pick it in the invitation settings so the email links to it.
Content
Website Builder (CMS)
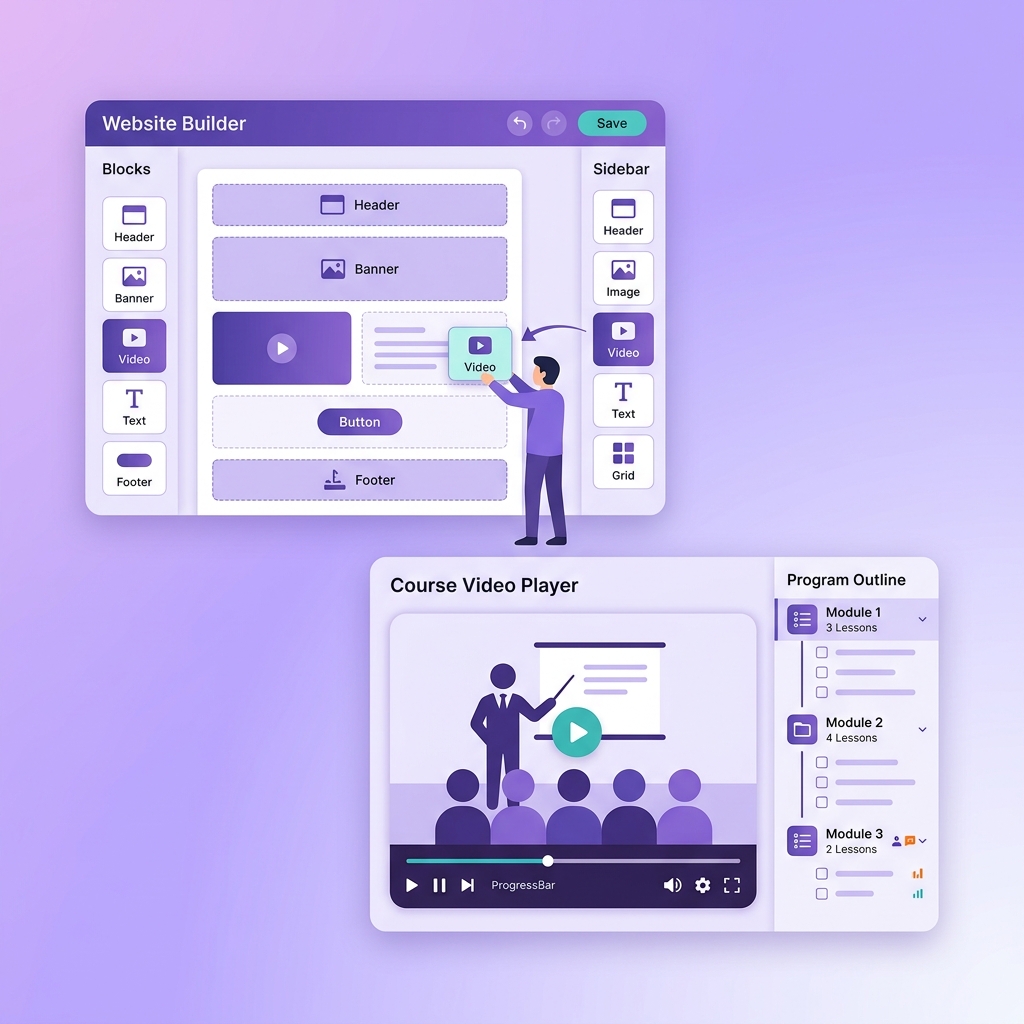
Build and manage your gym’s website from the dashboard, with 19 block types covering everything from a hero banner to a live class schedule. Duplicate whole pages, clone individual blocks, and get a warning before you navigate away with unsaved changes. No coding required.
Step-by-Step Guide
- 1Navigate to Dashboard → Content → Website.
- 2Click “New Page” and enter a title and URL slug (e.g. “about-us”).
- 3Add blocks: Hero, Rich Text, Image-Text, Features, Image-Features, Testimonials, FAQ, Pricing, Gallery, Video, Stats, Team, Timeline, Map, Footer, CTA, Schedule, Events and Contact Form.
- 4Fill in each block’s content, and use the copy button on a block to duplicate it rather than rebuilding it.
- 5To duplicate a whole page, click “Duplicate” — blocks, SEO and metadata are all copied to the new page.
- 6Want a block to stand out? Give it a brand colour and it switches to the full-width brand style; clear the colour to go back to the classic look.
- 7Toggle “Show in Nav” to add the page to your site’s navigation menu.
- 8Save as you go, then click “Publish” to push the page live. Saving alone keeps it as a draft — the live page only changes when you publish.
- 9Site Settings has three tabs: General & Branding, SEO, and Tracking. On Tracking, paste your Google Analytics ID and your Google Ads conversion ID and label — every enquiry sent from your Contact Form block is then recorded as a lead in Analytics and a conversion in Google Ads, with no thank-you page to build.
Momentum Fitness — A Website Before Opening Day
Momentum Fitness was a brand-new gym with no budget for a web designer. The owner added a Hero block with their tagline, a Pricing block with three membership tiers, a Schedule block pulling the real timetable, and a Contact Form block. It took an afternoon, and it looked professional enough to start taking enquiries before the doors opened.
Illustrative example — names and figures are representative of typical studios, not a customer endorsement.
Pro Tips
- Use the Hero block for one clear message and one clear call to action. Everything else can wait until they’ve scrolled.
- The Contact Form block routes messages into your Support inbox and creates a Lead — so a website enquiry is never just an email.
- Duplicate a finished page to spin up a campaign landing page variant in seconds.
Programs
Programs are your membership offerings — the thing a member joins and pays for. Each one has a payment frequency, a price per payment, optional capacity, self-join and self-cancel toggles, and an optional waiver. The list shows total programs, active subscribers and estimated monthly revenue, with subscriber counts on each card.
Step-by-Step Guide
- 1Navigate to Dashboard → Content → Programs.
- 2Read the summary cards: Total Programs, Active Subscribers and Est. Monthly Revenue.
- 3Click “Create Program” and set the title, description, payment frequency (One-off, Weekly, Fortnightly, Monthly, Quarterly or Yearly) and price per payment.
- 4Set a capacity limit if the program should cap out — leave it empty for unlimited. A utilisation bar appears on the program card.
- 5Tick “Allow Members to Join” so members can enrol themselves, or leave it off to keep enrolment admin-only.
- 6Tick “Allow Members to Cancel” if members should be able to unsubscribe without contacting a coach.
- 7Choose a waiver template under “Program Waiver / Terms & Conditions” if members must accept terms before joining — you’ll see a preview of the text they’ll be shown.
- 8Selling a set number of classes? Enter “Class pass: number of classes” and the program becomes a pass that check-ins count down — see the Class Passes guide.
- 9Open a program to see everyone on it, its capacity, transaction history and linked courses. Click “Add people” to put members on it yourself — for anyone who pays another way. They see the program’s classes straight away, but nobody is charged: billing only starts when a member joins and pays from their portal.
- 10On the Events form, “Who can see it” can limit a public class to this program’s members — so juniors see the juniors’ timetable and adults see theirs.
Red Dragon MMA — Structured Training Paths
Red Dragon offers BJJ, Muay Thai and Wrestling. They built a program for each discipline with its own price, capacity and required waiver, so a new member joins “BJJ Fundamentals” rather than a vague “membership”. The summary cards give the owner revenue per discipline at a glance, which is what finally settled the argument about which timetable slot to expand.
Illustrative example — names and figures are representative of typical studios, not a customer endorsement.
Pro Tips
- Name programs by discipline or skill level so members can self-select without asking.
- Use programs as an upsell — an “Advanced” program at a higher price is easier to sell than a general price rise.
- Capacity limits do double duty: they protect the class experience and create genuine scarcity.
Online Courses
Build video and text courses out of modules and lessons. Lessons take an embedded YouTube or Vimeo link, a directly uploaded video, rich text, a quiz, or an attached workout. Courses are linked to programs, so members get access by joining the program that carries them.
Step-by-Step Guide
- 1Navigate to Dashboard → Content → Courses.
- 2Click “Create Course” and enter the title, description, course level (Beginner, Intermediate, Advanced) and a thumbnail image.
- 3Open the course and add Modules — these are your chapters.
- 4Add Lessons within each module. Set the lesson type and display order, and tick “Enable Free Preview” on any lesson non-subscribers should be able to watch.
- 5Give the lesson its content: an external video URL (YouTube or Vimeo), a directly uploaded video, rich text, or a quiz.
- 6Attach a workout to a lesson where the movement breakdown belongs alongside the video.
- 7Link the course to a program (Content → Programs → open the program → Linked Courses). Members who join that program get the course.
- 8Members work through the lessons in their portal and tick each one off; their progress bar shows how many of the course’s lessons they’ve completed.
Sarah’s Yoga Online — A Second Revenue Stream
Sarah, a yoga instructor in Perth, built a “30-Day Flexibility Challenge” as a course of short daily video lessons, then created a program at a modest monthly price and linked the course to it. Existing in-studio members could add it on; people who couldn’t make class times could buy it alone. She didn’t teach a single extra hour to launch it.
Illustrative example — names and figures are representative of typical studios, not a customer endorsement.
Pro Tips
- Start with a short course of five to ten lessons and see whether anyone finishes it before you build a full curriculum.
- Price the program, not the course — the program is what members join, and the course is what they get for joining.
- Use Free Preview on your first lesson. Letting people see the quality is the cheapest sales tool you have.
Settings
Dashboard Overview
Your daily command centre. Admins see four KPI cards — active members, monthly revenue, total members and today’s classes — plus a revenue chart, upcoming classes and recent activity. Instructors see the same view without the revenue figures.
Step-by-Step Guide
- 1Navigate to Dashboard (the Dashboard link in the top nav).
- 2If your business profile or Stripe connection is incomplete, a setup checklist appears at the top — work through it first, because payments depend on it.
- 3Read the KPI cards: Active Members, Monthly Revenue, Total Members and Classes Today.
- 4The revenue chart shows your recent trend, and Upcoming Classes shows what’s on next.
- 5Recent Activity lists the latest transactions and sign-ups so you can see what changed since yesterday.
- 6The first time an Admin or Instructor signs in with a password, they’re asked to set up two-step sign-in with an authenticator app before the dashboard opens. It takes about a minute; from then on, signing in asks for the code.
The Grind Studio — Starting Every Day Right
The owner of The Grind opens the dashboard every morning before the first class. She checks how many classes are on, sees any new sign-ups, and glances at the day’s schedule. Two minutes, and she knows the pulse of the business. She calls it her morning coffee dashboard.
Illustrative example — names and figures are representative of typical studios, not a customer endorsement.
Pro Tips
- Check it daily. Trends are obvious when you look often and invisible when you look monthly.
- Instructors can be given dashboard access without seeing revenue — useful for a head coach who runs the floor but not the books.
- Finish the setup checklist before you build anything else. Programs and tickets are of no use until Stripe is connected.
Business Settings
Your gym’s profile: business and trading name, ABN, contact details, address, logo, timezone, custom domain, the waivers shown at signup, and your Stripe connection. This is the first thing to set up.
Step-by-Step Guide
- 1Navigate to Dashboard → Settings → Business.
- 2Enter your business name, trading name, ABN, contact email and phone.
- 3Add your address — it appears in the footer of the emails you send, which is a legal requirement for marketing email in Australia.
- 4Add your logo URL. It appears in the navbar and the member portal.
- 5Set your timezone. Every event time depends on it, so get this right before you build a timetable.
- 6Set your custom domain here if you’re running the site on your own web address.
- 7Under signup waivers, select the waiver templates new members must accept when they request access.
- 8Click “Connect Stripe” and complete Stripe’s onboarding. Money from your members lands in your own Stripe account.
First Setup — From Zero to Payments
A new studio’s first session in WeeksPro is this page: business details, logo, timezone set to their state, and Stripe connected. From that point they can take online payments, sell subscriptions and issue tickets. No web developer, no IT contractor, no waiting on anyone else’s schedule.
Illustrative example — names and figures are representative of typical studios, not a customer endorsement.
Pro Tips
- Set the timezone first. Everything with a time on it inherits from here, and fixing it later means checking every event.
- Complete Stripe onboarding before creating programs or ticket templates — they’re not much use unsold.
- Contact form routing is not configured here — that lives on the Support page’s Settings tab.
Your WeeksPro Plan & Billing
What you pay WeeksPro, as opposed to what your members pay you. Shows your current plan and its included member limit, your trial end date, your payment method, an estimate of your next invoice based on your current member count, and your invoice history.
Step-by-Step Guide
- 1Go to /dashboard/billing.
- 2The status banner shows whether you’re on a free trial, active, or cancelled — and when a trial ends.
- 3“Your Plan” shows the plan name, the base monthly fee, and how many members are included.
- 4“Payment Method” shows the card on file. If there isn’t one, add it before your trial ends so nothing lapses.
- 5“Next Invoice Estimate” projects your next bill from your current plan and active member count.
- 6“Invoice History” lists past invoices, each with a link to the full invoice.
No Surprises at the End of the Trial
A studio in its first month can see exactly what happens when the trial ends: which plan they’re on, how many members it includes, and what the first real invoice will be at their current size. The estimate updates as they grow, so crossing into the next tier is something they see coming rather than something they discover on a statement.
Illustrative example — names and figures are representative of typical studios, not a customer endorsement.
Pro Tips
- Add a payment method before the trial ends rather than on the last day.
- The invoice estimate tracks your active member count — check it before a big intake so the jump isn’t a surprise.
- Your members’ payments are separate and live under Revenue → Finance. This page is only about what you pay us.
The AI Assistant
An assistant that lives in the bottom-right corner of your dashboard. Ask it where something is and it takes you there; describe what you want to create and it opens the right form with the fields already filled in. It runs in your own browser and is available to Admins.
Step-by-Step Guide
- 1Sign in as an Admin and open any dashboard page. The assistant appears as a round button in the bottom-right corner.
- 2Click it to open the chat panel. The first use downloads the model to your browser, which takes a moment — after that it’s local.
- 3Ask where something lives: “where do I set up belts?” and it navigates you to the right page.
- 4Describe something you want to create — a program, an event, a course, a ticket, an announcement, a rank, a CMS page or block, or a member invitation — and it opens that form pre-filled for you to review.
- 5Nothing is saved until you check the form and press save yourself.
- 6Type into the chat box — it’s a text conversation, not a voice one.
- 7Close the panel with the X. It’s hidden on member-facing pages.
Skipping the Menu Hunt
An owner who uses the dashboard twice a week doesn’t memorise where twenty-odd modules live. Asking “where do I add a new class?” and being taken there beats hunting through the Schedule menu, and asking for “a Monday 6pm beginners class, cap 20” opens the event form already filled in, leaving only a review and a save.
Illustrative example — names and figures are representative of typical studios, not a customer endorsement.
Pro Tips
- It’s a navigator and a form-filler, not an autopilot — always read what it filled in before you save.
- The model downloads once and then runs in your browser, so the first open is slower than the rest.
- It’s Admin-only and hidden from members, so anything you type stays on your side of the platform.
Ready to put these features to work?
From A$89/mo with a 30-day free trial. No credit card required.
Start Free Trial